Thursday, 12 January 2017

Bags Galore


I've been busy sewing bags for Christmas.

Buttercup Bag

First, there was the Buttercup Bag, a pattern by Made By Rae. I made some modifications by adding the top zipper closure, and attached D-rings to the strap... so that I could change the strap if I didn't like it.

I love the whimsical cats print on the fabric, and thought it suits the buttercup bag perfectly!

Buttercup bag... work in progress

My finished buttercup bag
My finished buttercup bag!

Trail Tote

Then, there was the Trail Tote (small version), a pattern by Noodlehead. Again, I added the top zipper closure, and 1-inch square-rings to the strap because I couldn't decide between sewing the strap myself or using store-bought webbing.

My trail tote... work in progress

Eventually, I went with store-bought cotton webbing. And I forgot to take pictures of the final finished product before gifting it away!


Lucky Cat Bag

I designed this one by myself, specifically for the lucky cat (招财猫) fabric in my stash. It has 4 pockets on the outside, 2 front and 2 back. As with the other two bags, it also has the top zipper closure.

My lucky cat bag
My lucky cat bag
Kawaii 招财猫 fabric bag
Kawaii 招财猫 fabric bag


For me, handbags like these must be adequately secured, either with a zipper or a prominent flap. Most free bag sewing patterns out there don't include top zipper closures. But maybe that's why they are free.. because it isn't easy! It took me some time to figure out the best way to construct the bags with the top zipper, and I had to sew some parts by hand because the bulk just couldn't go under the sewing machine!

Double-zippered Wristlets

I also made about half a dozen of these double-zippered wristlets. Unfortunately, in my haste to finish and gift-wrap them in time for Christmas, I forgot to take pictures :(

These two were the first "prototypes".

Fabric double-zippered wristletFabric double-zippered wristlet

The fabrics were fat quarters and fat flats that I got from the sale at Spotlight. The finished size is approximately 8" x 5". I could make 2 wristlets out of a pair of FQ/FF (1 exterior fabric and 1 interior fabric).


These bags were all sewn in quilting weight cotton fabrics. Quilting cotton has to be adequately interfaced or the resulting bag will be too floppy and without structure. I have since, begun exploring heavier fabrics, such as canvas, drills and home decor fabrics, for sewing bags. So far, in terms of handling and construction, I prefer the heavier fabrics to quilting cotton. The former also produces sturdier, more hard-wearing bags. But it is harder to find heavy fabrics in cute, interesting prints.

Sunday, 25 September 2016

Crochet / Amigurumi Pikachu & Pokéball

Jumping on the Pokémon Go craze bandwagon,  I made these amigurumi Pokémon toys :)

Amigurumi Pokémon toys
Amigurumi Pokémon toys

Crochet Pikachu and Pokéball


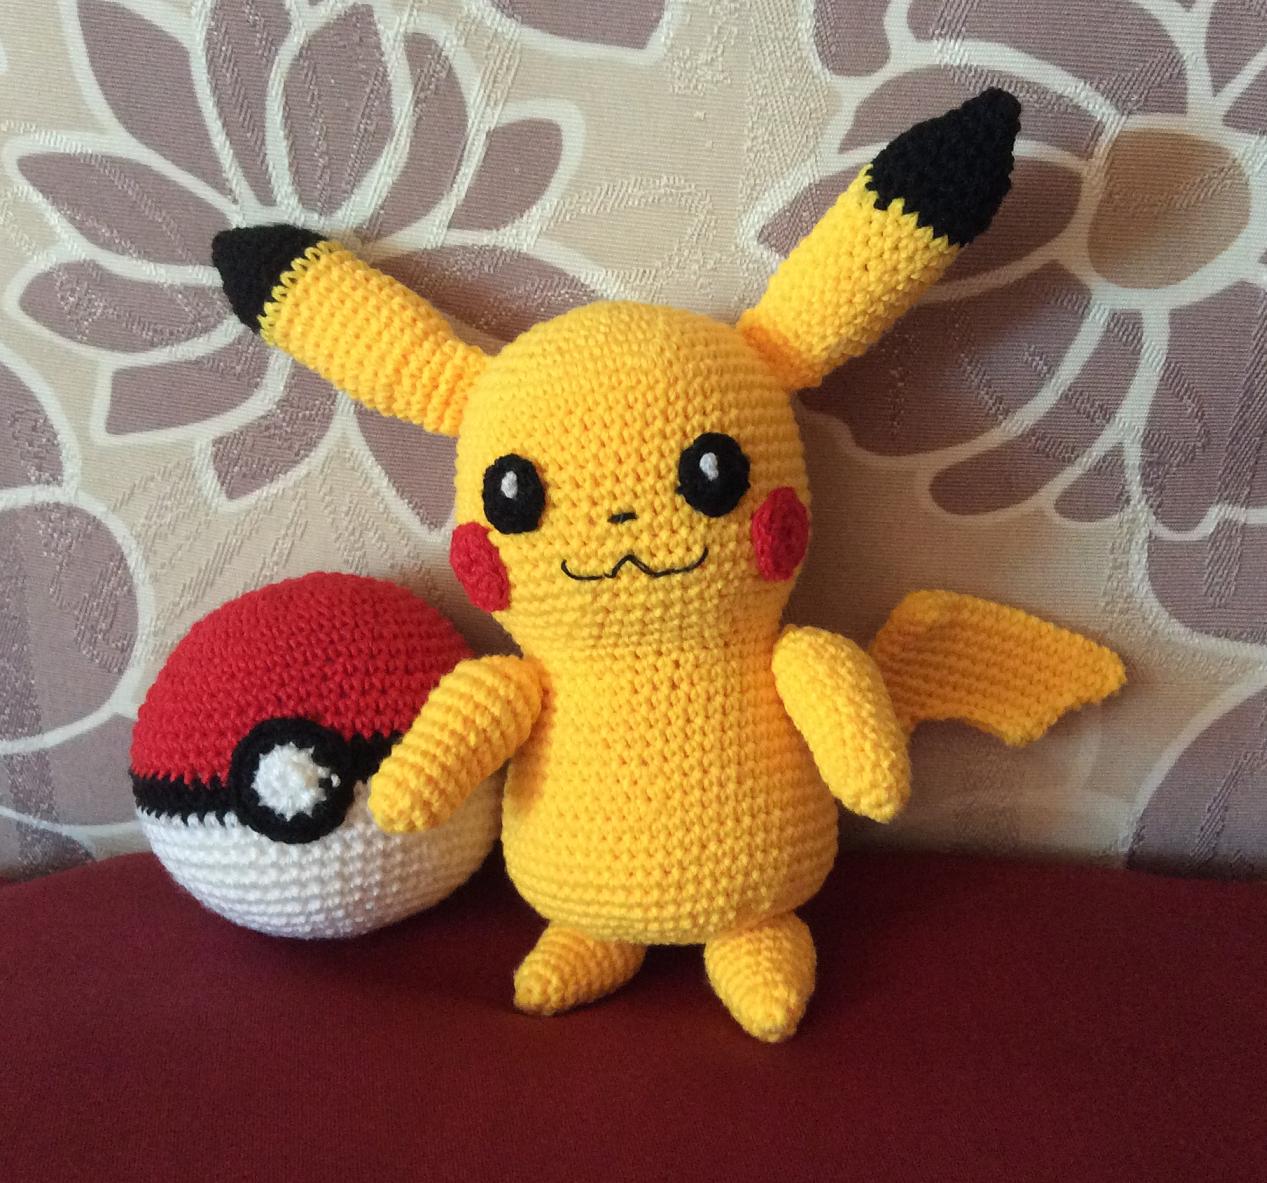
Pikachu is based on this amigurumi Pikachu pattern from Sabrina's Crochet. It makes a decent size - big enough as a toy (I can hold the body in my hand) and small enough for the work to be completed in a day or two. I followed the pattern for the head, body, limbs and ears, but crocheted the tail in the round instead of making 2 separate pieces and sewing them together, following the pattern just roughly. The other small details like eyes, cheeks, nose and mouth were made to fit. Love how it turned out :)

The Pokéball is basically a sphere. I used this Ideal Crochet Sphere that truly creates the perfect sphere! Mine is the 30-row ball that turned out a little smaller than a tennis ball. Perfect size for kids to grasp and throw at Pikachu, poor thing :)


Crochet Pikachu toy
Crochet Pikachu toy

Crochet Pikachu toy - back view

Pikachu and Pokéball

Wednesday, 24 August 2016

First Sewing Project - Tote with Welt Pocket and Recessed Zipper

I just finished my first sewing project - this Owl Tote.
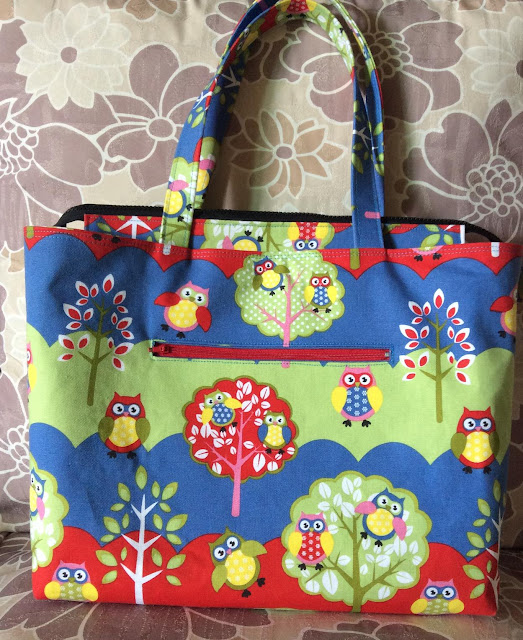
Lined boxed-corner tote with recessed zipper

Not bad considering it was my first big sewing project, and that I'm new to machine sewing :)

The bag is basically a boxed-corner bag with lining. I added welt pockets and a recessed zipper just to make the work a little more interesting.

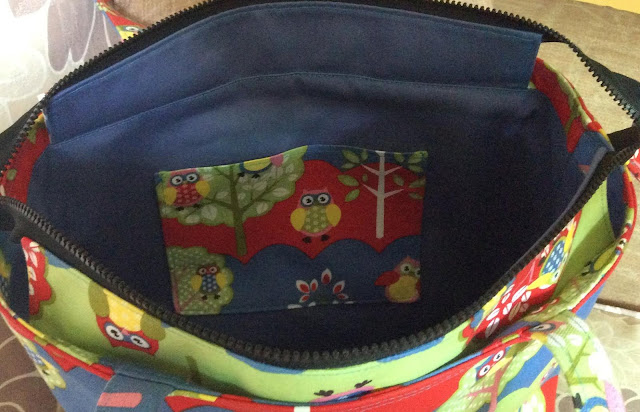
Interior welt pocket

Interior open pocket

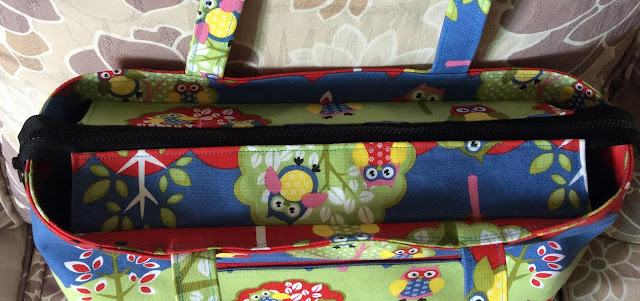
Recessed zipper, with extended zipper on both ends for a wide opening

There are many tutorials out there on DIY bag making/sewing. These are the ones that I find particularly helpful in making this bag.


On Bag Making Process

ikatbag.com - I am so grateful for this wonderful site by LiEr, the author. She wrote a whole series on bag making! The series is great for understanding bag construction and how to approach sewing a bag by yourself. You can find it at The Bag Tutorials located at the side panel of the site and navigate from there. Or go straight to the Blog Archive of January 2013 when the first post in the series was written.


Sewing a Boxed-corner Tote with Lining and Zipper

I basically based my bag on this video tutorial by Debbie Shore. She shows the different pieces of a basic lined, boxed-corner tote and how they are sewn together. Very easy to follow.


Welt Pocket

How to add a zipper pocket to any purse pattern by So Sew Easy.
Simple instructions with helpful tips. I particularly like that it shows a few variations, all well explained.


Bag Straps 

Sew Perfect Fabric Bag Straps by Sewplicity - For simple and basic bag straps.

ikatbag.com has a full chapter on bag straps as well, with some more advanced techniques.


Recessed Zipper

How to sew a recessed zipper on a bag by So Sew Easy - Clear instructions and very easy to follow. There's a video tutorial as well. Debbie Shore's tote bag video tutorial includes sewing the recessed zipper but I find it quicker to refer to this one as it is only about creating the zipper panels and sewing them to the bag.


Zipper Tabs

My oh my... these tiny, seemingly easy pieces are the most finicky! I was finally satisfied with the ones made by following this tutorial from Sew4Home. I also took the time to hand-baste the whole thing before sewing - helped a lot!


Bag Bottom

I contemplated adding a bag bottom insert to strengthen the bottom but decided to go ahead without one (for now), because I didn't want to "waste" a piece of my very precious stiff interfacing. Bag interfacing is so expensive and so hard to come by here. But if I had, I was going to follow this tutorial by You SEW Girl which uses Peltex. Some other options would include using thin plastic crafting sheets (available at local craft stores), thin plastic cutting boards (i.e. available at Daiso), reuse/recycle bag bottoms from old bags. I figure I can always make a separate insertable/removable piece in the future, if the need arises. Anyway, we'll see how the bag holds up to wear and tear without one.

My Bag Pattern / Dimensions
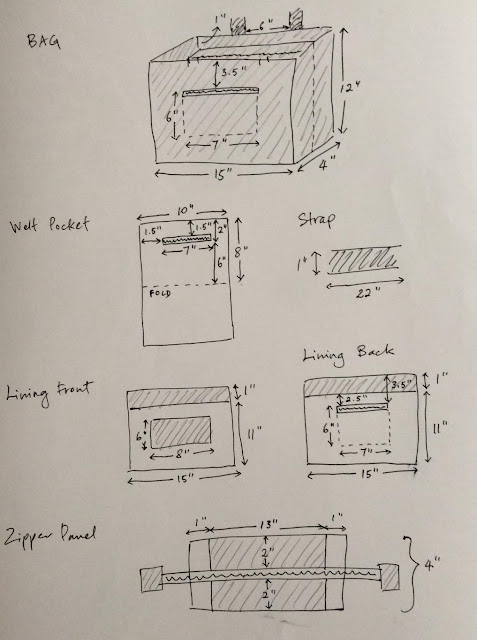
Bag pattern / dimensions


My goal is to have a bag that is 15" wide, 12" tall and 4" deep, with straps that would enable the bag to be carried on the shoulder - about 22" long. Pockets and other dimensions are then worked out from these decisions.

I use 1/2" seam allowance on all pieces. The dimensions of the pieces below take this seam allowance into account.

Bag Exterior (front & back) : 
Exterior Fabric 20" x 15" (x 2 pieces)

Front Welt Pocket:
7" zipper
Lining Fabric 10" x 16"

Bag Interior (front & back):
The interior is divided into 2 sections - the main lining body and the top 1 inch that goes above the zipper panel. For aesthetic reasons, I use exterior fabric for the top 1 inch and lining fabric for the main body.

Exterior Fabric 20" x 2" (x 2 pieces)
Lining Fabric 20" x 14" (x 2 pieces)

Interior Front Open Pocket
To add aethestic interest, I use exterior fabric for the front side of the open pocket, and lining fabric for the inside portion. The exterior fabric is also cut a little longer than the lining fabric, so that it extends about 1/2" toward the inside of the pocket.

Exterior Fabric 9" x 8"
Lining Fabric 9" x 6"

Interior Back Welt Pocket
7" zipper
Lining Fabric 10" x 16"

Zipper Panel
19"/20" zipper
Exterior Fabric (top side of panel) 14" x 3" (x 2 pieces)
Lining Fabric (bottom side of panel) 14" x 3" (x 2 pieces)

Bag Straps
Exterior Fabric 4" x 22" (x 2 pieces)

Zipper Tabs
Exterior Fabric 4" x 2.5" (x 2 pieces)

For exterior fabric, I use home decor weight fabric, with thick fusible interfacing.
For lining, I use medium weight cotton fabric, with medium fusible interfacing.

After completing the outer bag and lining, trim off all seam allowances to 1/4" or less. There is quite a lot of bulk especially the part where the zipper panel is sewn to the bag lining.


Sunday, 17 July 2016

Tapestry Crochet Water Bottle Carrier

Here's another water bottle carrier that I crocheted using the Tapestry Crochet method.

Tapestry Crochet Water Bottle Carrier
Close-up view of Tapestry Crochet Water Bottle Carrier
Close-up view

I've written about the construction of my water bottle carrier/holder in a previous post here.

Pattern Summary


Bag Bottom

For this bag, I chose a simple 3-color spiral pattern for the bag bottom.

3-color spiral pattern for bag bottom
Start with the magic circle with 9 stitches and increase 9 stitches every round for 13 rounds, for a total of 117 stitches. In the following transitional round, increase 3 stitches evenly for a total of 120 stitches.


Bag Body

The bag body is simply 5 repeats of this 24-stitch pattern. Total 120 stitches per round.

24-stitch repeat bag body pattern
The top of the bag is finished with a round of decorative shells.

Bag Strap

To save time, I bought a length of blue webbing, a pair of D-rings and a slider from Daiso :) I crocheted 2 small rectangle pieces to attach the D-rings to each side of the bag. The use of the slider makes the strap adjustable!

Crochet water bottle carrier

More information about the construction of the water bottle carrier here.

Tuesday, 14 June 2016

Crochet Granny Square Bag

This is a crochet granny square bag that I made some time ago.

Crochet granny square bag
Granny squares are marvelous. They are small, quick and fun to make. You can virtually mix and match any color combination. There is a myriad of granny square pattern resources on Pinterest and other craft sites. It's also easy to create your own.
Crochet granny square bag
Crochet granny square bag - other side

Bag Construction

Any number of squares can be used, depending on the size of you want to build. I used 35 pieces of granny squares for this bag. 
  • 12 each for the front and back panels
  • 4 for each side panel
  • 3 for bottom panel
(12 x 2) + (4 x 2) + 3 = 35

I alternated between dark purple and light purple pieces, and made sure the colors lined up before sewing/joining. Laying them out also helped to determine what colors to use to make next square.

Lay out the granny squares on the floor
Lay out the granny squares
  1. First, sew/join the pieces for the front panel. The front panel is constructed from (3 x 4) pieces of squares. Here, I joined the squares with single crochets on the wrong side, so that the seam doesn't show and appears invisible on the right side. 
  2. Repeat for the back (or other) panel
  3. Next, join the 4 squares for the side panel, continuing with the 3 bottom squares, and the 4 squares of the other side panel, so that you get a long strip of squares in (11 x 1) layout. 
  4. Sew the front panel to the side+bottom piece from step (3), going from the top down to the bottom corner, across the bottom, and back up to the top on the other side. Here, I used single crochets on the right side, so as to give the right side seam a prominent and visible "corner".
  5. Repeat for the other panel.
  6. Finish the top with some decorative picots.
  7. Attach bag straps and lining, and it's good to go!

Colorful crochet granny square bag