 |
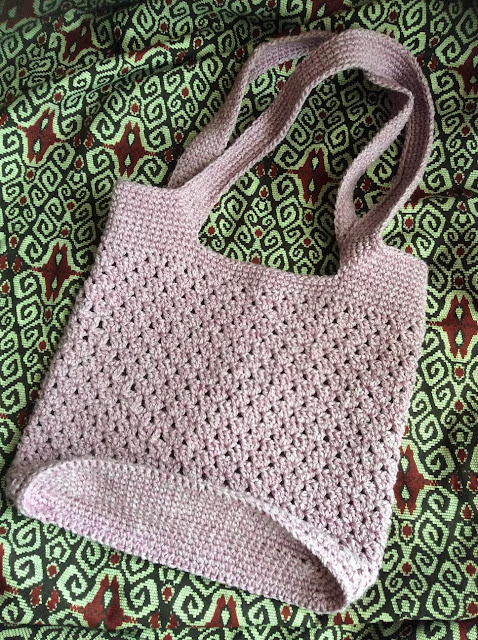
| Crochet Mini Shoulder Tote |
About The Pattern
The bag is crocheted in a tube, with the bottom sewn or stitched together at the at end. The shell pattern is basically constructed from multiples of 3 stitches. That forms the basis of the foundation chain - any multiple of 3. For example, a foundation chain of 99 stitches will give you 33 shells. The length of the foundation chain will form the circumference of the bag. So if you want your bag to measure 6 inches in width, the foundation chain should be at least 12 inches.An alternative is to crochet around the foundation chain, forming the circle right from the base, thus eliminating the need to sew. Make sure the foundation chain is the length of the desired width of the bag, not the circumference.
The instructions for Round 2 of the original pattern is especially confusing.
Rnd 2: Sl St in each dc of shell into sp between first two shells. Work Beginning Shell. {Work Shell in space between next shell.} Repeat between {} to end. Join in top of ch 3. (17 Shells)
*Slip stitch in the top of ch3 (of the Beginning Shell) to join the round. Then slip stitch in the next 2 dcs (of the Beginning Shell) until you reach the space between the Beginning Shell and the next Shell. Work Beginning Shell in this space --> this is the beginning shell of the new round. Then work Shell in the space between the next 2 shells, to end* At the end of round, repeat from *.
Normally when you sl st to join stitches in the round, the "seam" is formed on the same stitch column, i.e. the sl st sits on top on the sl st of the previous round. With the method above, the "seam" is more diagonal than straight as the stitches for the new round starts at the space between the first 2 shells rather than directly above the first shell.
For the base, I simply made an oblong piece of single crochets, and sc it to the bottom of the body piece.
 |
| Added an oblong-shaped base |
 |
| Shell stitches |
About The Yarn
The yarn I used for this bag is Bendigo Woollen Mills Harmony in Carnation which is a cotton-wool-lycra blend. I had knitted up a top/vest with it, but frogged the whole thing soon after because I didn't like it and would never wear it. The knitted fabric was very thick and heavy, and felt rough on the skin. It didn't have the squishiness of wool nor the smoothness of cotton. Instincts led me to try Harmony on a this bag, and I loved the result! For me, this yarn is perfect for making crochet bags because it produces a thick, sturdy fabric that is essential for bags.
 |
| Love the bag! |
You are very talented. I hope you are still crocheting after all these years.
ReplyDelete